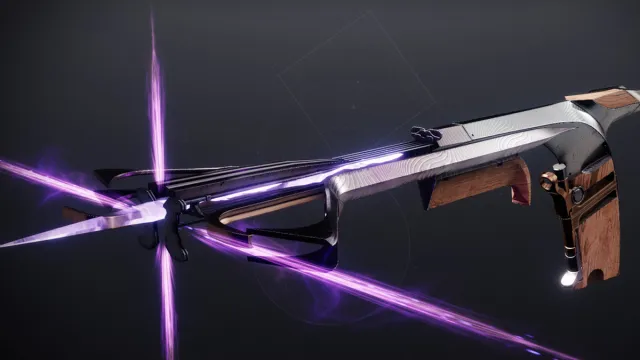
Season of the Wish’s dungeon is here, with Destiny 2’s Warlord’s Ruin proving tough but enjoyable for players to complete thus far. The dungeon’s Exotic weapon, Burield Bloodline, is an interesting piece of kit that only improves once you obtain its Catalyst.
But how do you get your hands on the Exotic upgrade? This quest will take you all over the Warlord’s Ruin dungeon, solving puzzles and discovering a hidden boss to defeat. Spoilers ahead!
How to get the Buried Bloodline Catalyst in Destiny 2
To get the Buried Bloodline Catalyst in Destiny 2, you’ll need to complete multiple runs of the Warlord’s Ruin dungeon introduced with the Season of the Wish. Obviously, you can’t get the Catalyst before first obtaining the Buried Bloodline, so make sure you’ve got the sidearm itself before progressing.
You will also need to complete the In the Shadow of the Mountain quest which will see you collect Hefnd’s bones and gather Dark Ether Tincture and Blighted Wishing Glass from the rest of the Destiny world.
Once you’ve completed the quest, load up Warlord’s Ruin again as there are three puzzles and a secret hidden boss you’ll have to defeat in order to unlock the Catalyst.
Puzzle One: Lanterns in the jail
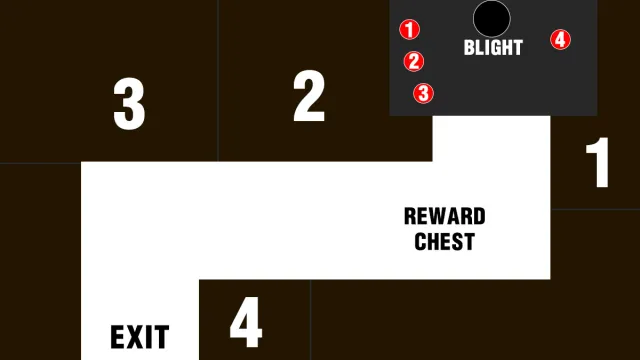
After defeating the first boss of the dungeon, you’ll come to a line of prison cells before reaching a gate. Behind the gate will be a Taken Blight that, when shot with the Buried Bloodline, will give the fireteam a 30-second buff called “Imminent Wish…” Shortly after, three of the four torches behind the gate will light up.
Note down which of the torches are lit, then find the corresponding jail cell in the corridor behind you based on my very crude map above. With the buff active, stand next to the Darkness Totem until it is lit. If you’ve done this correctly, after the buff timer expires you’ll hear a chime and receive a message saying “An unspoken wish is silenced. Buried Bloodline clicks audibly.“
If you fail, simply wait for the Blight to appear again and repeat until successful. Take note of the method here as you’ll need to do this twice more in the raid in different locations.
Puzzle Two: Outside the battlement just before the great bridge
After completing the next jumping section you’ll come to a giant bridge that leads to the second boss of the dungeon. We won’t be pushing to the Ogre just yet—after clearing the bridge, turn around to the ruined castle behind you and you should see another Taken Blight up to the left of the walkway.
Shoot it, and once again, a number of torches will be lit to the right of the battlement. You’ll also see the Darkness Totems both attached to and out in the open on floating pillars. Simply line up alongside the Totem directly across from the lit torch. Once you’ve done all three, you’ll receive the same silenced message as in puzzle one.
Puzzle Three: The wide cavern
Continue through to defeat the Ogre, then progress until you reach an open-air zone with floating rocks and a giant Blight in the middle. Look to your bottom-left and, tucked inside a small room, you’ll see another small Taken Blight. Shoot it with the Exotic to trigger the third puzzle.
Again, torches will light up across the chasm at an archway—these torches also correspond to matching Darkness Totems on the floating rocks and pillars. Match up from left to right and activate the correct Totems within 30 seconds to complete the final puzzle.
The Totems on the left are a little tougher to reach as they’ll be on the very top of the rock column but you should have plenty of time and, once again, you’ll be able to repeat the puzzle if you mess up.
The final step: Opening the Cairn Chamber Gateway and taking on Primeval Thressia
If you’ve completed all three puzzles, progress through the remainder of the jump puzzle and move toward the final boss. You’ll come across a “Toland spirit“—a white floating ball of energy—that can be opened. This is the Cairn Chamber Gateway which will lead to Primeval Thressia, the hidden boss of Warlord’s Ruin.
Open the portal and proceed to the final room, which will have six torches and six matching Darkness Totems. When the boss spawns it will be invulnerable, but three of the torches will light up. Once again you’ll need to stand on the correct Totems based on the lit torches to bring down the boss’ shield.
Once the shield is down, fire away. Don’t hold back here as Thressia has a lot of health. You’ll likely need to complete the mechanic a few times as her shield will eventually reappear. Whittle her down and once she’s defeated, the Catalyst (plus the bonus chest in the room) will be yours.
What does the Buried Bloodline Catalyst do in Destiny 2?
The Buried Bloodline Catalyst further enhances the sidearm while Devour is active. After proccing Devour, whenever the weapon deals damage, the hit target is weakened meaning they’ll take 15 percent extra damage from all sources.
The weaken mechanic is popular with Void subclasses but you won’t need to run Void to take advantage of Buried Bloodline’s weaken effect with the Catalyst. You’ll be able to run a different subclass and weapon setup that may suit your playstyle better while still enhancing the amount of damage you and your fireteam can deal. The tracking bolts make it very easy to hit smaller enemies too, but you’ll likely want to save your Devour weaken combo for larger mobs like Champions or bosses.
